Guides
How to read a sewing pattern
A pattern envelope is four separate documents pretending to be one. Read them in the right order and the project stops being intimidating.
By Michael W. · Published
Disclosure: this page contains affiliate links. As an Amazon Associate, StitchStarter earns from qualifying purchases at no extra cost to you. Prices are read from Amazon daily and dated; the price you pay is the one Amazon shows at checkout. It never changes which machines we recommend. Full disclosure.
Quick picks
The short answer. Every pick is explained in full below, including who should skip it.
| # | Product | Best for | Score | Price |
|---|---|---|---|---|
| 1 | 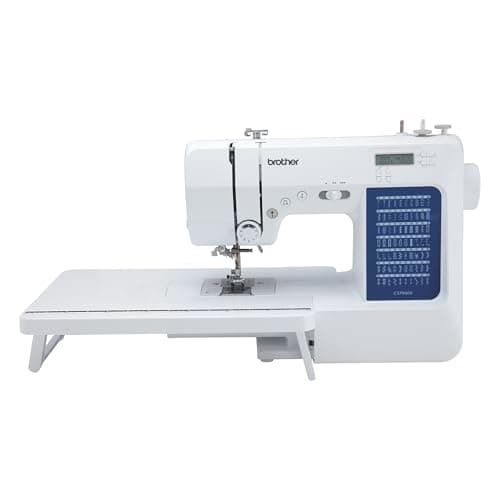 Brother CS7000XThe screen names the stitch, width and foot the instructions ask for. Brother CS7000XThe screen names the stitch, width and foot the instructions ask for. | Best for following a pattern | 8.2 | |
| 2 | 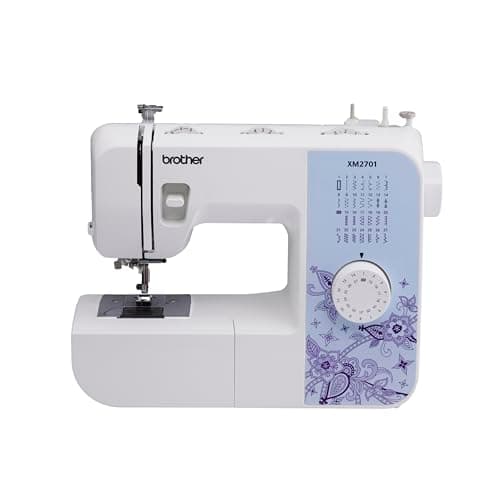 Brother XM2701Every stitch a beginner pattern calls for, and a one-step buttonhole. Brother XM2701Every stitch a beginner pattern calls for, and a one-step buttonhole. | Best cheap pattern machine | 7.3 | |
| 3 | 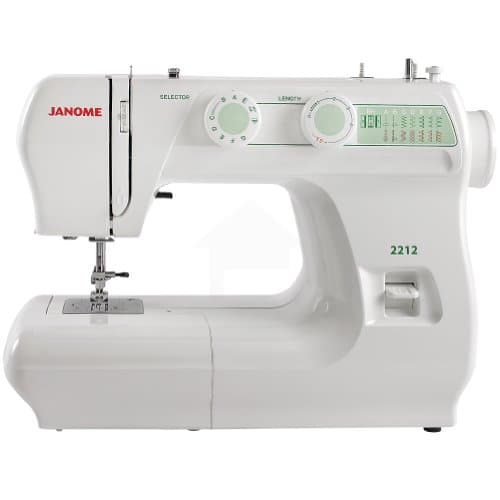 Janome 2212Two dials, so a pattern's stitch length instruction is one movement. Janome 2212Two dials, so a pattern's stitch length instruction is one movement. | Best for learning the settings | 7.6 |
Prices shown are Amazon prices as of October 10, 2026 and can change.Scores are our editorial judgment on six axes, explained on the methodology page. We do not run a test lab and never claim to.
A sewing pattern is four documents in one envelope, and reading them in the wrong order is why a first project stalls. Read the back of the envelope first to pick your size and buy the right amount of fabric. Read the layout diagram second to lay the tissue out correctly. Read the instruction sheet third, all the way through, before cutting anything. And learn the five symbols printed on the tissue, because they are the language everything else is written in.
Nothing on a pattern is more complicated than that. It is just dense, and it assumes a vocabulary nobody taught you - which our terms glossary covers if a word on your envelope is not here.
Step 1: the back of the envelope
Everything you need before you spend money is on the back, in four blocks.
The body measurement chart. This is the single most important thing to understand about patterns: pattern sizes are not clothing sizes, and they run substantially larger. Measure your bust, waist and hip and pick the size from the chart, ignoring whatever number is on your clothes. Choosing by your usual size is the most common first-project mistake and the hardest to fix later.
The finished garment measurements. Often a separate, smaller table. This is what the garment will actually measure when sewn, including the ease - the extra room designed in so you can move. Compare it with a garment you own that fits the way you want this one to.
The fabric requirements table. Rows by size, columns by fabric width - usually 45 inch and 60 inch. Find your size, find the width of the fabric you are buying, and the number where they meet is your yardage. Buy a little extra if the fabric has a large print you will want to match.
The notions list. Zipper length, button count and size, thread, interfacing, elastic. Buy these at the same time as the fabric. A project that stops because the zipper is the wrong length usually does not restart.
Views, difficulty and what the drawing is not telling you
A pattern often contains several views - version A with long sleeves, view B sleeveless, view C with a collar. The pieces, the yardage and the instructions all differ by view, so decide which one you are making before you read anything else and then ignore the other letters entirely.
The line drawing on the back is more honest than the photograph on the front. The photo is styled, pressed and often pinned at the back; the drawing shows the actual seam lines and darts. Trust the drawing.
Difficulty labels vary by brand and mean roughly: how many techniques the project combines. An “easy” pattern with a zipper and a buttonhole is harder for a beginner than a moderate one with neither. Our beginner patterns guide covers which to start with, and what to sew first covers the project before that.
Step 2: the five symbols on the tissue
The symbols that appear on nearly every commercial pattern.
The grainline is the one to get right. Fabric behaves completely differently along its length, across its width and on the diagonal, and a piece cut off grain will twist and hang badly no matter how well you sew it. Lay the arrow parallel to the selvage and measure from both ends of the arrow to the fabric edge - if the two measurements match, the piece is on grain.
Seam allowance is the distance between the cutting line and the stitching line, commonly 5/8 inch on commercial patterns and often 3/8 inch on independent ones. Check which yours uses, because it is printed once and assumed forever afterward.
Step 3: the layout diagram
The instruction sheet includes a small diagram showing every piece arranged on folded fabric, for your size and view and fabric width. It is not a suggestion. It is worked out so the pieces fit in the yardage, on grain, with the right pieces on the fold.
Two things to notice. Pieces drawn with a shaded or dotted outline are to be placed printed-side down. And the diagram tells you how to fold the fabric - lengthwise, crosswise or a partial fold - which changes everything that follows.
Then pin or weight each piece, check the grainline, and cut. Mark the notches and dots before you unpin the tissue, because transferring them afterward is guesswork.
Machines that make a pattern easier to follow
Picked on one thing: how easily you can set the stitch and length an instruction sheet asks for.
Brother CS7000X
Select a stitch and the screen shows the recommended width, length and presser foot - which is what the instructions are asking for anyway.
Skip it if You want physical dials instead of a menu, or you will be sewing canvas, upholstery or leather regularly.
Brother XM2701
Has every stitch a beginner pattern calls for, including a one-step buttonhole, at the bottom of the sensible range.
Skip it if You already know you will sew every week, or you want speed control and a quilting table.
Janome 2212
Stitch length and width are two visible dials, so 'stitch at 2.5' is one movement rather than a menu.
Skip it if You want an automatic threader, a one-step buttonhole or a drop-in bobbin - it has none of them.
#ad - buy links go to Amazon and earn us a commission at no extra cost to you. Prices shown are Amazon prices as of October 10, 2026 and can change. Full disclosure.
Step 4: the instruction sheet
Read it from start to finish before you cut. Not to memorize it - to find the step that will stop you, so you can look that technique up while the fabric is still uncut.
Three habits make instruction sheets much easier. Circle your view letter on every step, so you stop reading instructions for a garment you are not making. Note the stitch settings each step asks for - a pattern that says “basting stitch” means a long straight stitch, and our stitch guide translates the rest. And press every seam as you go, because the instructions assume you did and the next step will not fit if you did not.
Why the suggested fabrics matter
The envelope lists suggested fabrics and often says “not suitable for obvious diagonals” or similar. Those lines are structural: the pattern was drafted assuming a certain drape and stretch, and a pattern drafted for woven cotton sewn in jersey will not fit.
For a first project, pick the most cooperative fabric on the list - quilting cotton, poplin, light twill - and our easiest fabrics guide explains which materials are punishing you unfairly. If the pattern calls for knits, read the settings guide for stretchy fabric before you start.
PDF patterns, briefly
Independent and downloadable patterns work the same way with two differences. You print and tape the pages together, aligning the registration marks, after printing the test square and confirming it measures what it claims - printer scaling is the only real hazard. And many use layered files, so you can print only your size, which makes the tissue far easier to read.
Seam allowances on independent patterns are often smaller than the commercial 5/8 inch, and a few include none at all. Check before cutting.
The picks in full
01 - Best for following a pattern
Brother CS7000X
Does the fiddly parts for you so you can spend your energy learning to sew.
- 70 built-in stitches, 7 one-step buttonholes
- Automatic needle threader, drop-in top bobbin
- Speed-control slider
- Wide table and 10 presser feet included
- Get it if
- You want threading, buttonholes and stitch settings handled by the machine, and you might try quilting later - the wide table is already in the box.
- Skip it if
- You want physical dials instead of a menu, or you will be sewing canvas, upholstery or leather regularly.
The trade-off
A metal internal frame inside a light plastic shell. That makes it easy to carry and quiet on cottons and mid-weights; it is not built for heavy layers every day the way a Heavy Duty is.
$279.99 · 11% off · price as of October 10, 2026
#ad - opens Amazon in a new tab. How we earn
How the Brother CS7000X scores
Our judgment on the six axes described on the methodology page. Not measurements - we do not run a test lab.
- Setup and threading
- 9/10
- Everyday stitch quality
- 8/10
- Thick fabric
- 6/10
- Beginner features
- 9/10
- Durability reputation
- 7/10
- Help for this exact model
- 10/10
Overall 8.2/10
02 - Best cheap pattern machine
Brother XM2701
The find-out-if-I-actually-like-this machine.
- 27 stitches, one-step buttonhole
- Automatic needle threader, drop-in bobbin
- 6 presser feet included
- Light enough to carry to a class
- Get it if
- You are not sure sewing will stick and you want a real, capable machine without spending what a better one costs.
- Skip it if
- You already know you will sew every week, or you want speed control and a quilting table.
The trade-off
Lightweight and basic. It does everything a beginner needs - buttonholes, zippers, hems - but you will outgrow it sooner than the CS7000X.
How the Brother XM2701 scores
Our judgment on the six axes described on the methodology page. Not measurements - we do not run a test lab.
- Setup and threading
- 9/10
- Everyday stitch quality
- 7/10
- Thick fabric
- 5/10
- Beginner features
- 7/10
- Durability reputation
- 6/10
- Help for this exact model
- 9/10
Overall 7.3/10
03 - Best for learning the settings
Janome 2212
Twelve stitches, nothing to break - the classroom favorite.
- 12 stitches, dial controls, four-step buttonhole
- Drop feed for free-motion quilting
- Free arm for cuffs and sleeves
- A reputation for lasting decades
- Get it if
- You value reliability over conveniences and want a machine still working long after the computerized ones are gone.
- Skip it if
- You want an automatic threader, a one-step buttonhole or a drop-in bobbin - it has none of them.
The trade-off
Fewer conveniences, more longevity. The four-step buttonhole and front-loading bobbin are a little more work to learn.
How the Janome 2212 scores
Our judgment on the six axes described on the methodology page. Not measurements - we do not run a test lab.
- Setup and threading
- 6/10
- Everyday stitch quality
- 9/10
- Thick fabric
- 7/10
- Beginner features
- 4/10
- Durability reputation
- 10/10
- Help for this exact model
- 7/10
Overall 7.6/10
Questions beginners actually ask
How do I read a sewing pattern as a beginner?
In four passes. Read the back of the envelope to choose your size and buy fabric and notions. Read the layout diagram to lay the tissue out on grain. Read the instruction sheet end to end before cutting. And learn the five tissue symbols - grainline, fold line, notches, dots and darts.
Are sewing pattern sizes the same as clothing sizes?
No, and this is the most common first-project mistake. Pattern sizes run substantially larger than ready-to-wear. Measure your bust, waist and hip and choose from the chart on the envelope, ignoring the size on the clothes you own.
What does the grainline arrow on a sewing pattern mean?
It shows the direction the piece must be laid relative to the fabric's length. Place the arrow parallel to the selvage and measure from both ends of the arrow to the fabric edge - if the two measurements match, the piece is on grain. A piece cut off grain twists and hangs badly.
What is seam allowance on a sewing pattern?
The distance between the cutting line and the stitching line. Commercial patterns commonly use 5/8 inch and independent patterns often use 3/8 inch. It is usually printed once on the instruction sheet and assumed everywhere afterward, so check it before you sew.
What do the notches on a pattern piece do?
They tell you which seam edge matches which. Cut them outward or snip a small mark in, and match notch to notch when you pin two pieces together - it is how you know a sleeve is in the right armhole and the right way round.
Do I have to use the fabric the pattern suggests?
Close to it, yes. The pattern was drafted around a particular drape and stretch, so a pattern meant for woven cotton will not fit if sewn in jersey. The suggested fabrics list is a structural instruction, not a style note.
Sources
Specifications are taken from manufacturer listings. We do not run a test lab and never claim to - how each machine is assessed is set out on our methodology page.
Read next
- Beginner sewing patterns
Which patterns to start with once you can read one.
- What to sew first
- Easiest fabrics to sew for beginners
- Sewing machine terms glossary